
How to Fill Your Walls
A couple of posts ago, we discussed the Florence Dining Room from our 2014 tour. It is a fabulous room that incorporates both traditional and modern elements to create an overall striking space. One thing that clearly stands out is the enlarged family photos. One way to get this look on a budget is using engineering prints. Today we are sharing a great DIY project that will cost you just a few dollars.
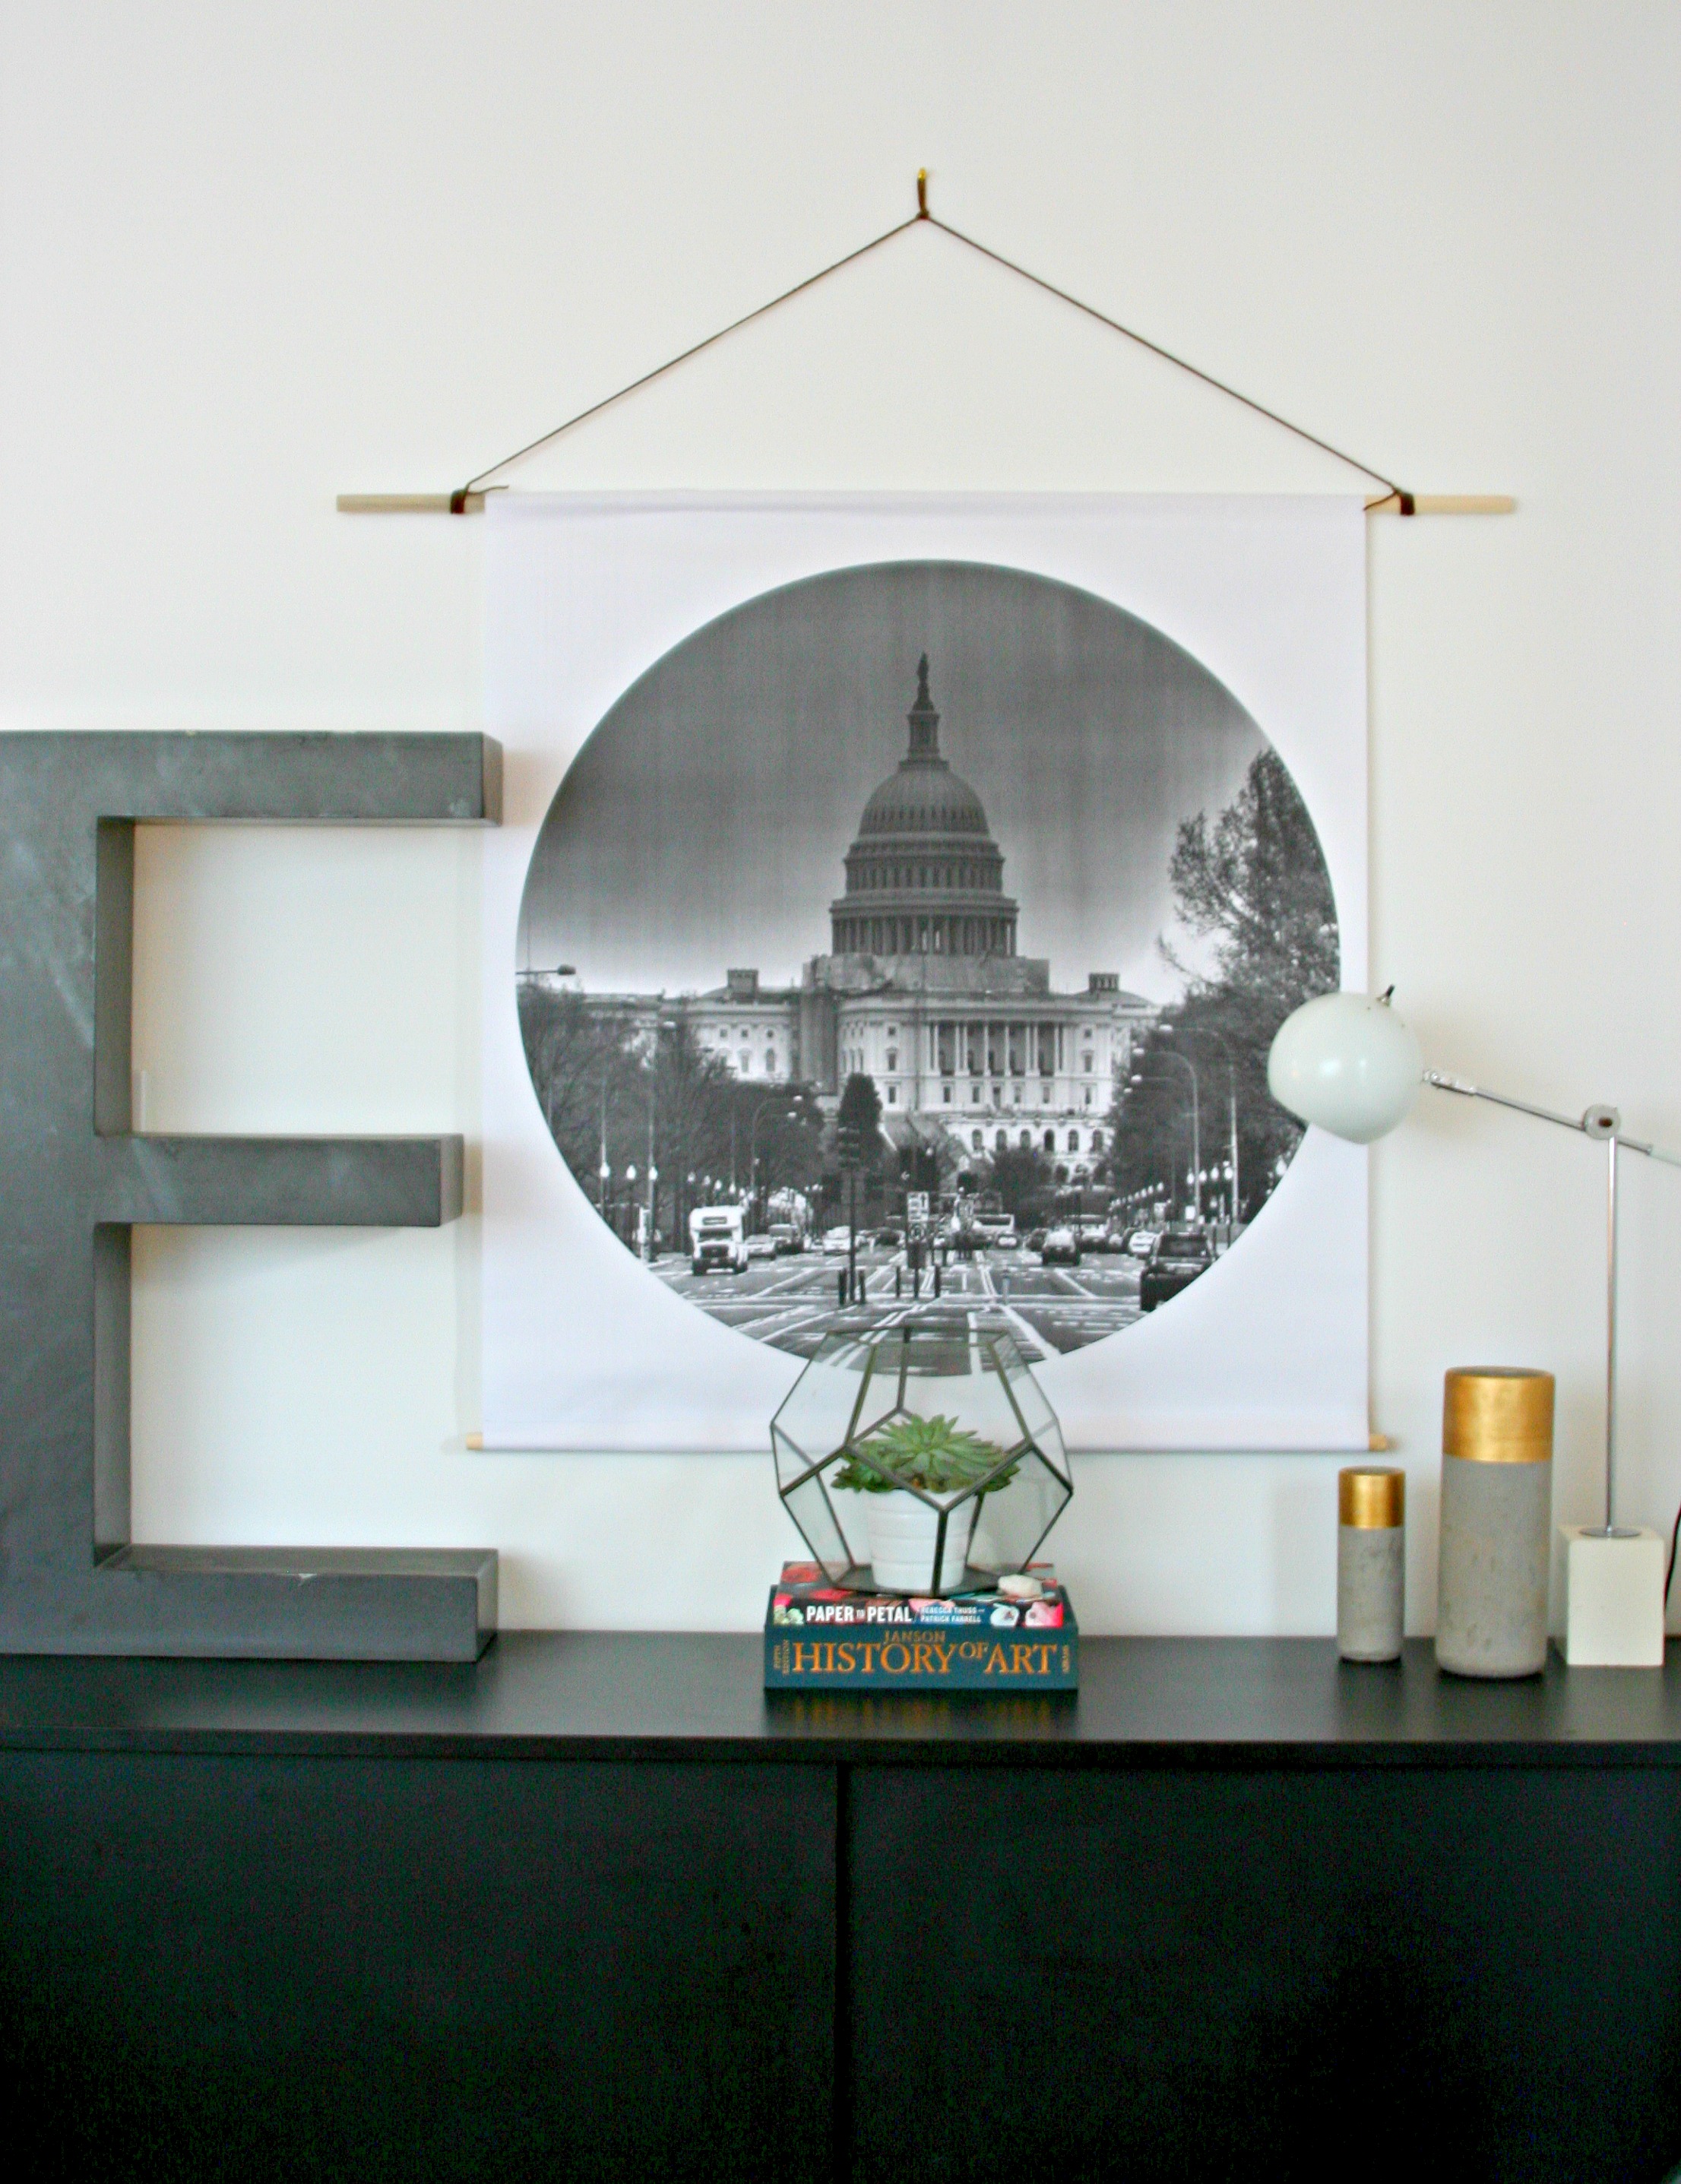
Here’s what we are making, an over-sized printed photo with a vintage classroom chart feel. Perfect to fill up a large wall, and keep on budget.
Get the full DIY below.
You will need an engineering print (more on that below), two wooden dowels, some string, twine, or leather, tape and a sewing machine or glue gun.
 This engineering print cost about $9.00 to print from FedEx Office, and was ready in about an hour. They are less expensive at Staples, but FedEx just happened to be around the corner. To make our poster Powerpoint was used. This is a great tutorial to help you out. Basically make one slide, change the dimensions of the slide to the size of your poster, this one is 36″ x 48″, insert your photo, and adjust accordingly. Leave approx. 5″ on the top and bottom for your “hem.” To create the circle, a circle was inserted and filled with our photo. You will want to use a fairly high quality image as it’s going to be LARGE. If your photo is in color you can change it to black and white by formatting your picture to grayscale. Once you are happy with your design, save it as a PDF. If you want to download ours, click here. The PDF can then be uploaded to the FedEx Office website with instructions to print as a black and white engineering print.
The dowels are 3/4″ pine dowels x 4′ and they were purchased at Home Depot for $2.75 each. Blue tape is a must as you will need to remove it from the paper and you don’t want to tear it. Last, you will need something to hang your picture from. We had some leather cord laying around that I had picked up at the thrift store. You can purchase similar leather here, or just use some good old twine, rope, ribbon, etc. – you’ll need about 2 yards.
 Once you’ve gathered your supplies, you can get to work!
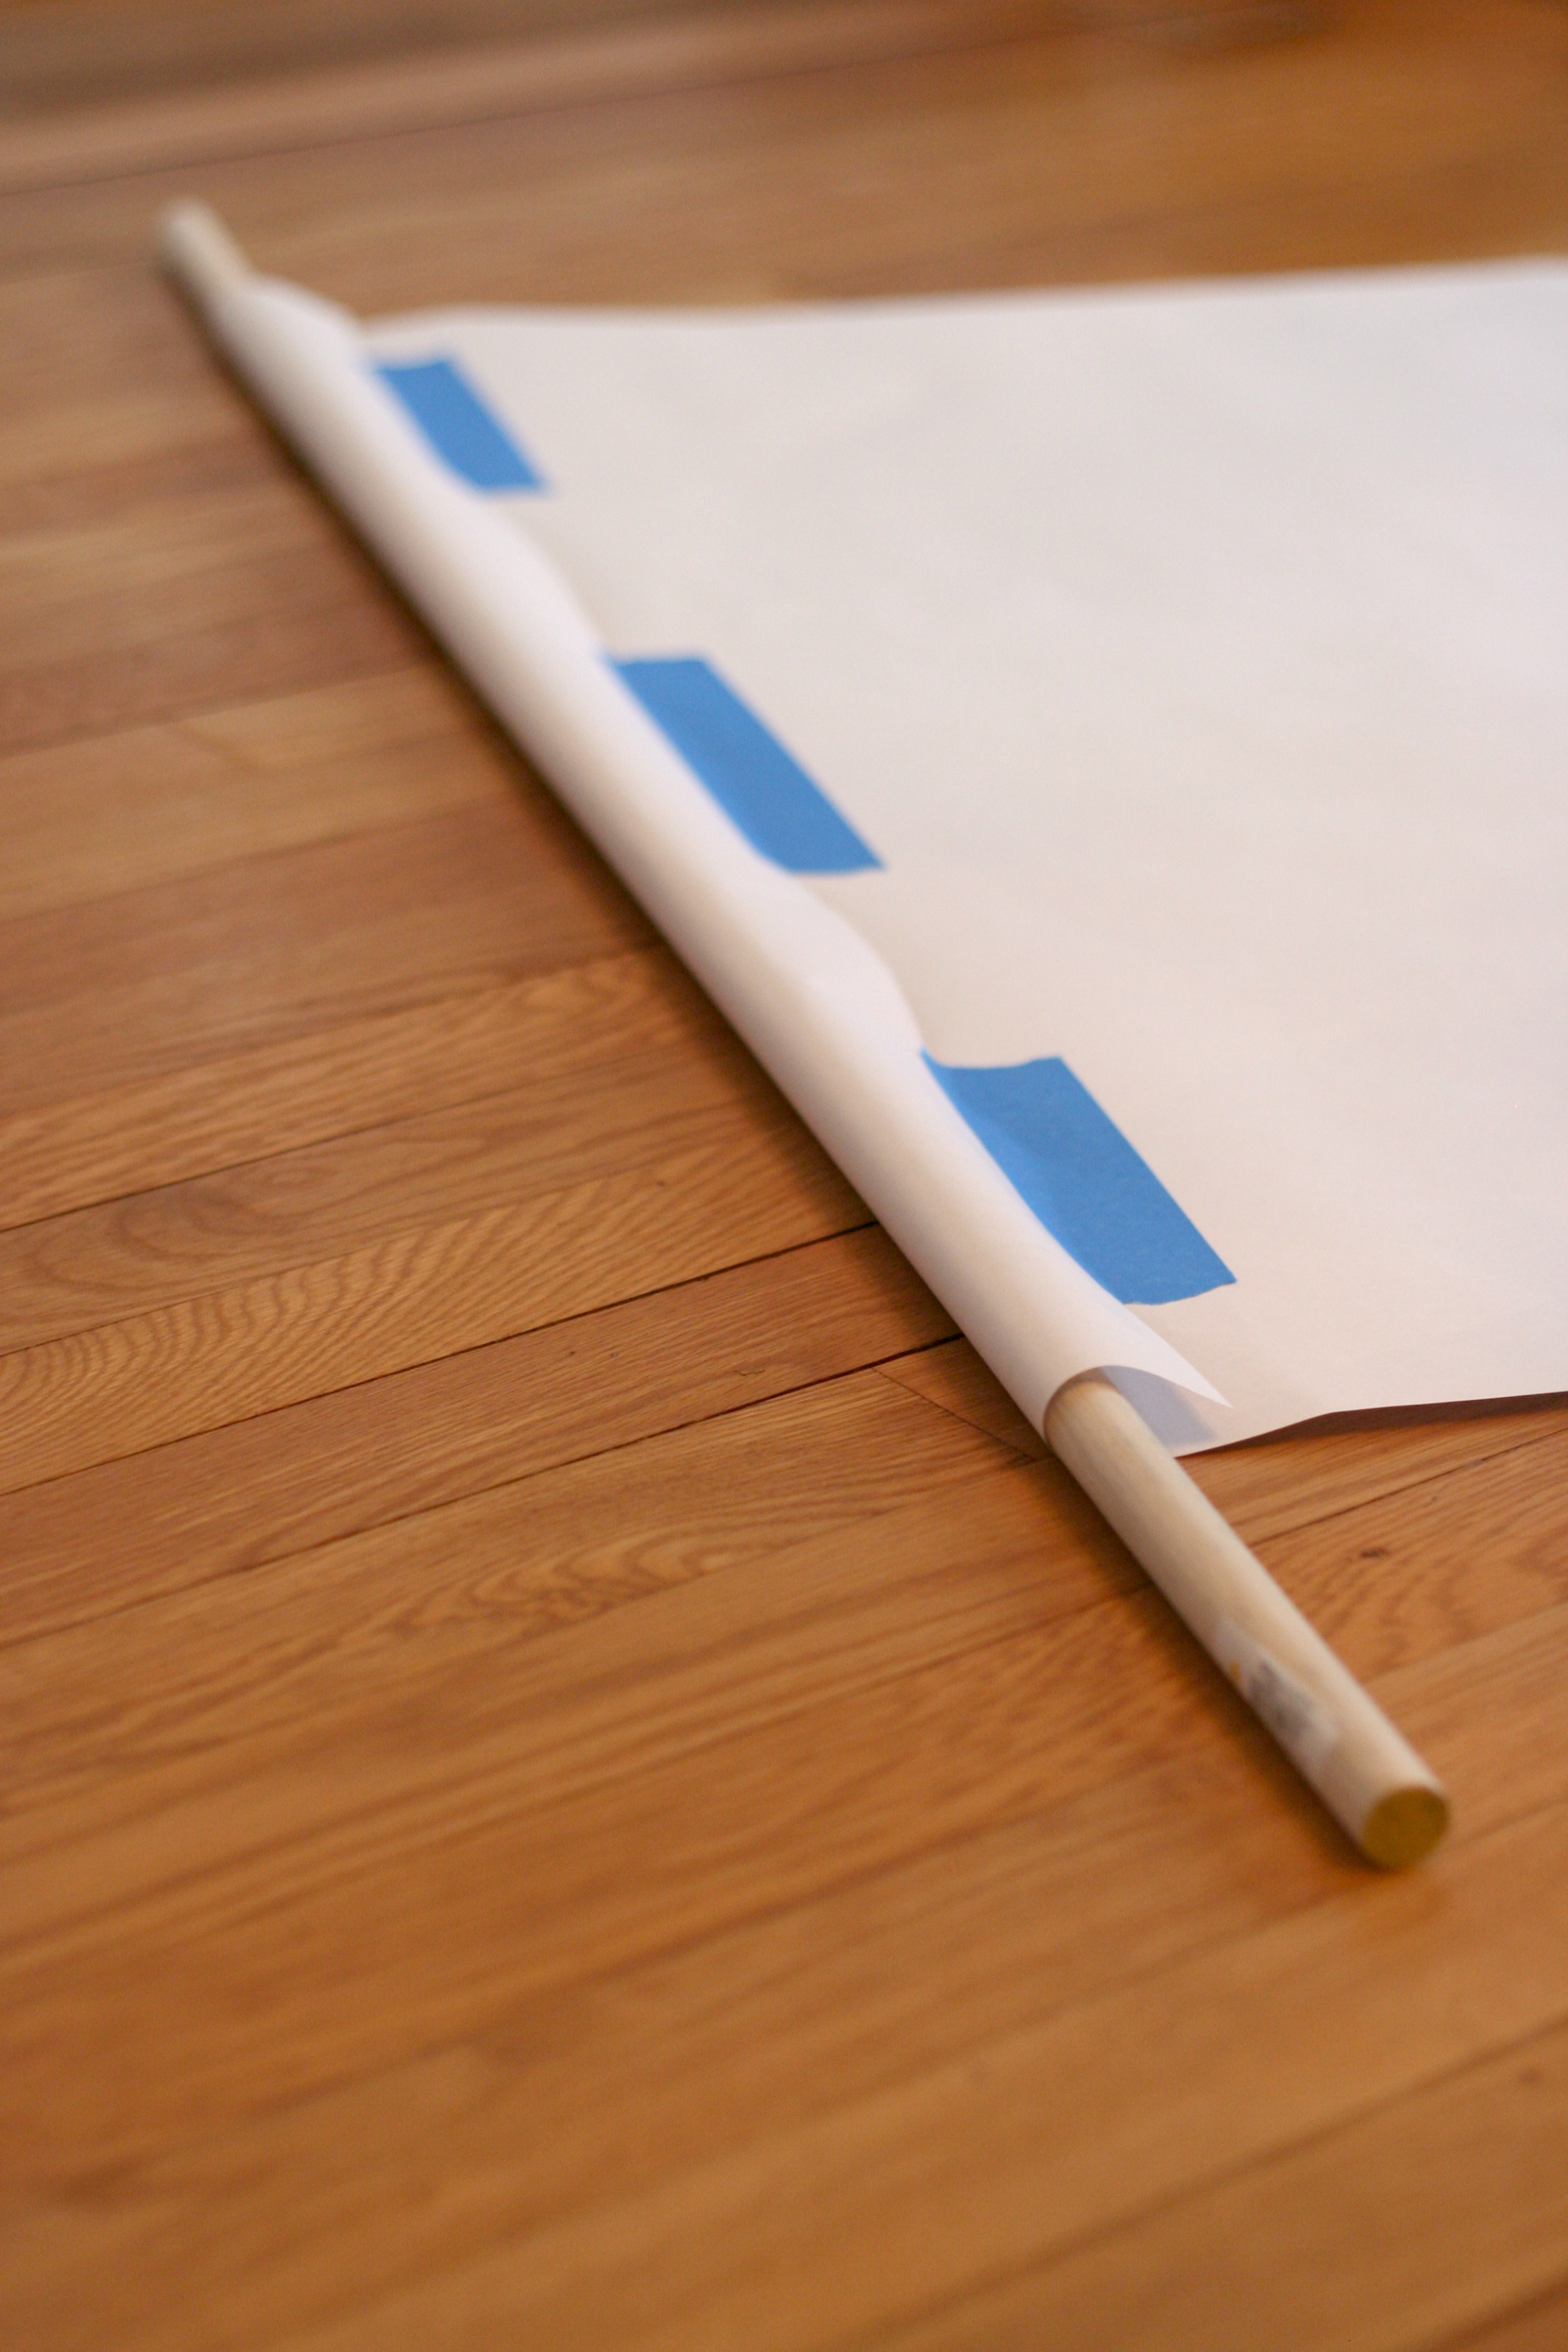
– Roll your paper edge around your dowel giving it plenty of extra room and tape into place using your blue tape. Make sure there is LOTS of extra room around your dowel as you will need a seam and this is paper, it doesn’t stretch and tears easily.
– Once you have it laid out take your dowel out and set it aside.
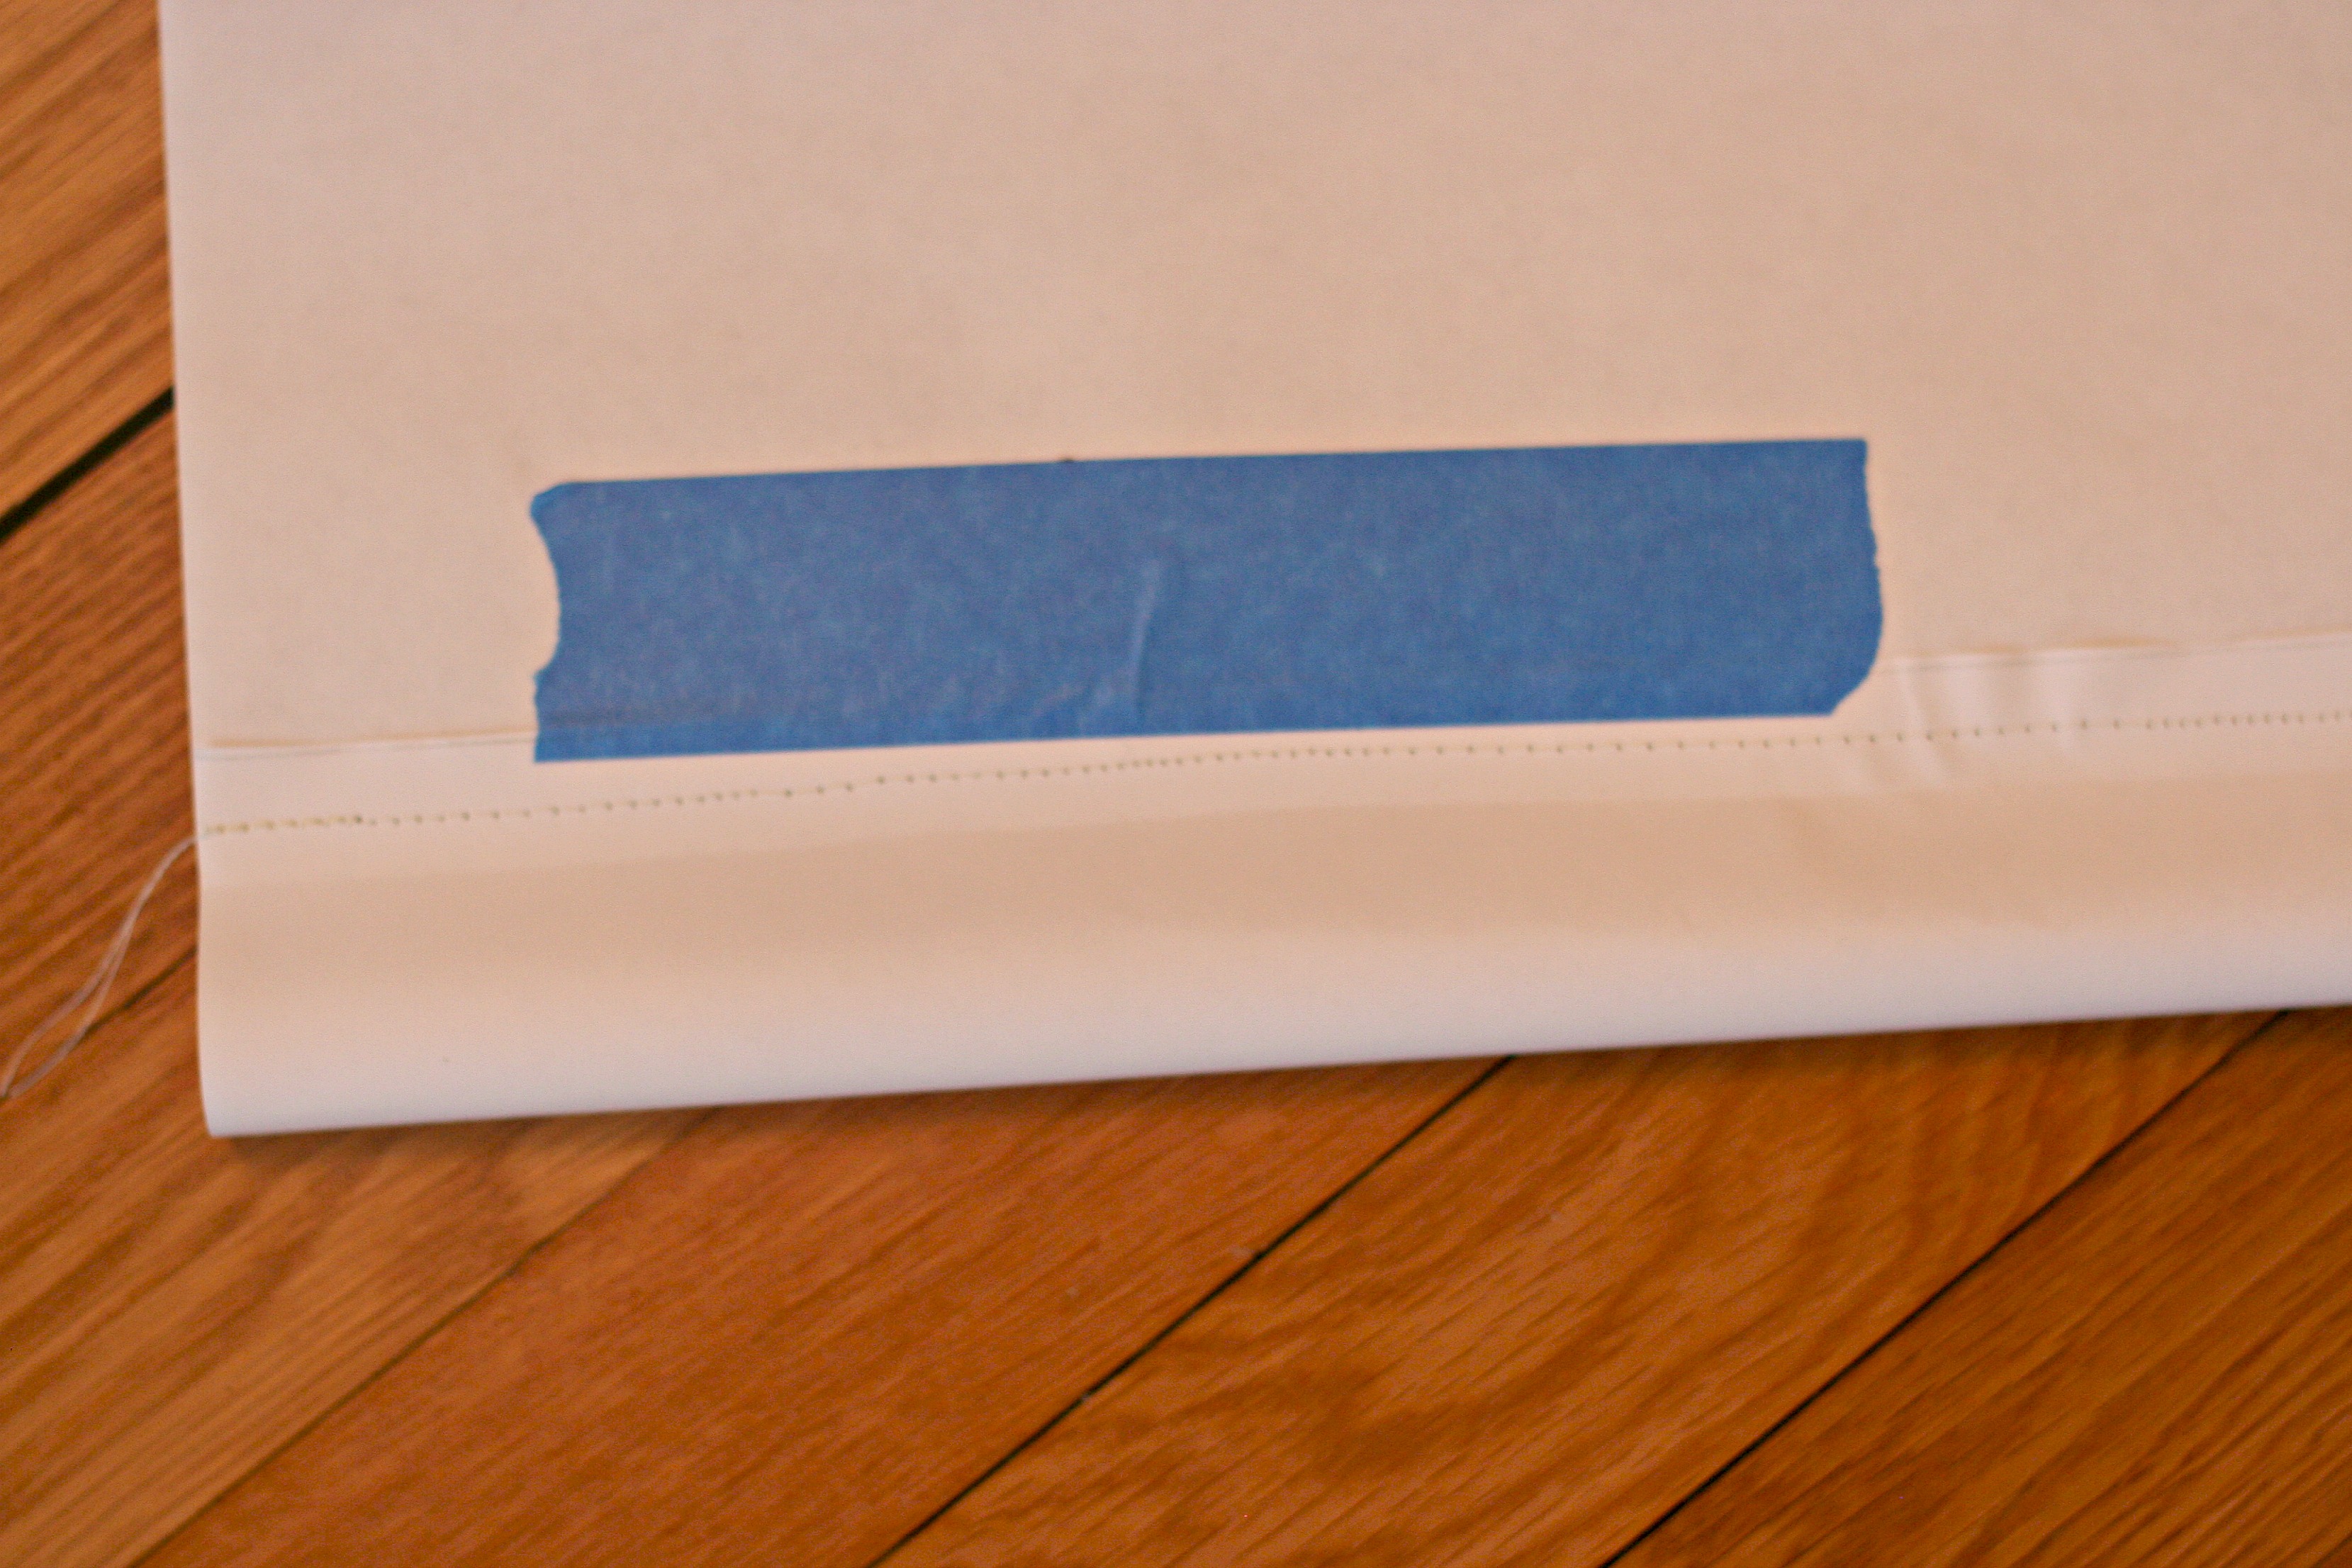
– Now here’s the tricky part. This one was sewed, on a sewing machine. Yes, you can do that. It takes a little maneuvering to get it lined up and through the machine, but it goes quickly. Use an old needle as paper will dull a new one quickly. Matching thread was used here which was good because it’s a little difficult to sew extra straight while feeding 3′ wide paper through the machine.
– Once your channel is created, you will need to follow the same steps to create one on the other side of your poster.
– If you do not have a sewing machine you can create your hem with a glue gun. Follow the same steps by taping your seam and slowly glue your way across.
 Carefully remove your tape and trim the thread. Now slide your dowels back into your channels. For the bottom dowel cut it an inch wider than your poster so just the edges are exposed. You can either leave your top dowel as is or cut it down to your liking. Tie off your poster with your leather, twine or rope and hang it up. For about $15.00 you have a fabulous wall covering!